
Ever wondered how to get that pretty winged liner without going overboard? The way I normally line my eyes is a mixture of tight lining and the classic winged tip. Here are the steps I take in the morning, rushing through that 5-10 mins to get out of the house for school.
1. Using/finding the perfect brush
The first most important step to lining your eyes is the brush itself. You need a really thin angled brush that is at the same time, dense. My favorite brush out of my whole collection is POSH brow brush. Its nice and thick and makes the perfect detailing.
 I had a friend that had so much problems with her gel liner from KATE, she was about to throw it away . I asked her "What brush are you using?". She said she had the angled brush from MAC, so I thought it must be good right? So I asked her to give me the eyeliner to try, and it worked beautifully for me so I didn't understand her hatred towards that product. So as you can see, brand doesn't really matter just finding the right brush for yourself makes a whole lot of difference.
I had a friend that had so much problems with her gel liner from KATE, she was about to throw it away . I asked her "What brush are you using?". She said she had the angled brush from MAC, so I thought it must be good right? So I asked her to give me the eyeliner to try, and it worked beautifully for me so I didn't understand her hatred towards that product. So as you can see, brand doesn't really matter just finding the right brush for yourself makes a whole lot of difference.2. Get your gel/cream eyeliner ready!
A lot of people (ex. Michelle Phan from youtube) loves to teach others to "warm up your eyeliner on the back of your hand by brushing it a few times." Seriously, I don't believe in that crap at all. I have tried it a few times, but what i notice is that I use more product then I really have to. I just love it all loaded up with the product and its totally ready to go! Here I'm using my new ELF cream liner in metallic olive. Iunno why but I have the tendency to use colors other then black. Its more interesting and when it smudges, you can't see it as much. Cream liners are much easier to work with and glides on like butter.
Here I'm using my new ELF cream liner in metallic olive. Iunno why but I have the tendency to use colors other then black. Its more interesting and when it smudges, you can't see it as much. Cream liners are much easier to work with and glides on like butter.3. Positioning Angle your head 45 degrees so that your looking at your mirror at an angle (makes your eye muscles/skin stretch a little more). Then place any finger on your lids (but not too much pressure) so that your lash line is more exposed and is easier to work with.
Angle your head 45 degrees so that your looking at your mirror at an angle (makes your eye muscles/skin stretch a little more). Then place any finger on your lids (but not too much pressure) so that your lash line is more exposed and is easier to work with.4. Start from the middle I know you can't really see in the picture, but start 1/3 from your lid. Basically what i do is I tight line my whole lid, then I do a classic Hollywood glam winged tip.

Line it all the way to the corner of your eye, but leave a little bit of space so you can get the perfect tip. Sorry if my wording doesn't really make sense, so look at the picture =).
5. Prepping for the Winged tip
5. Prepping for the Winged tip
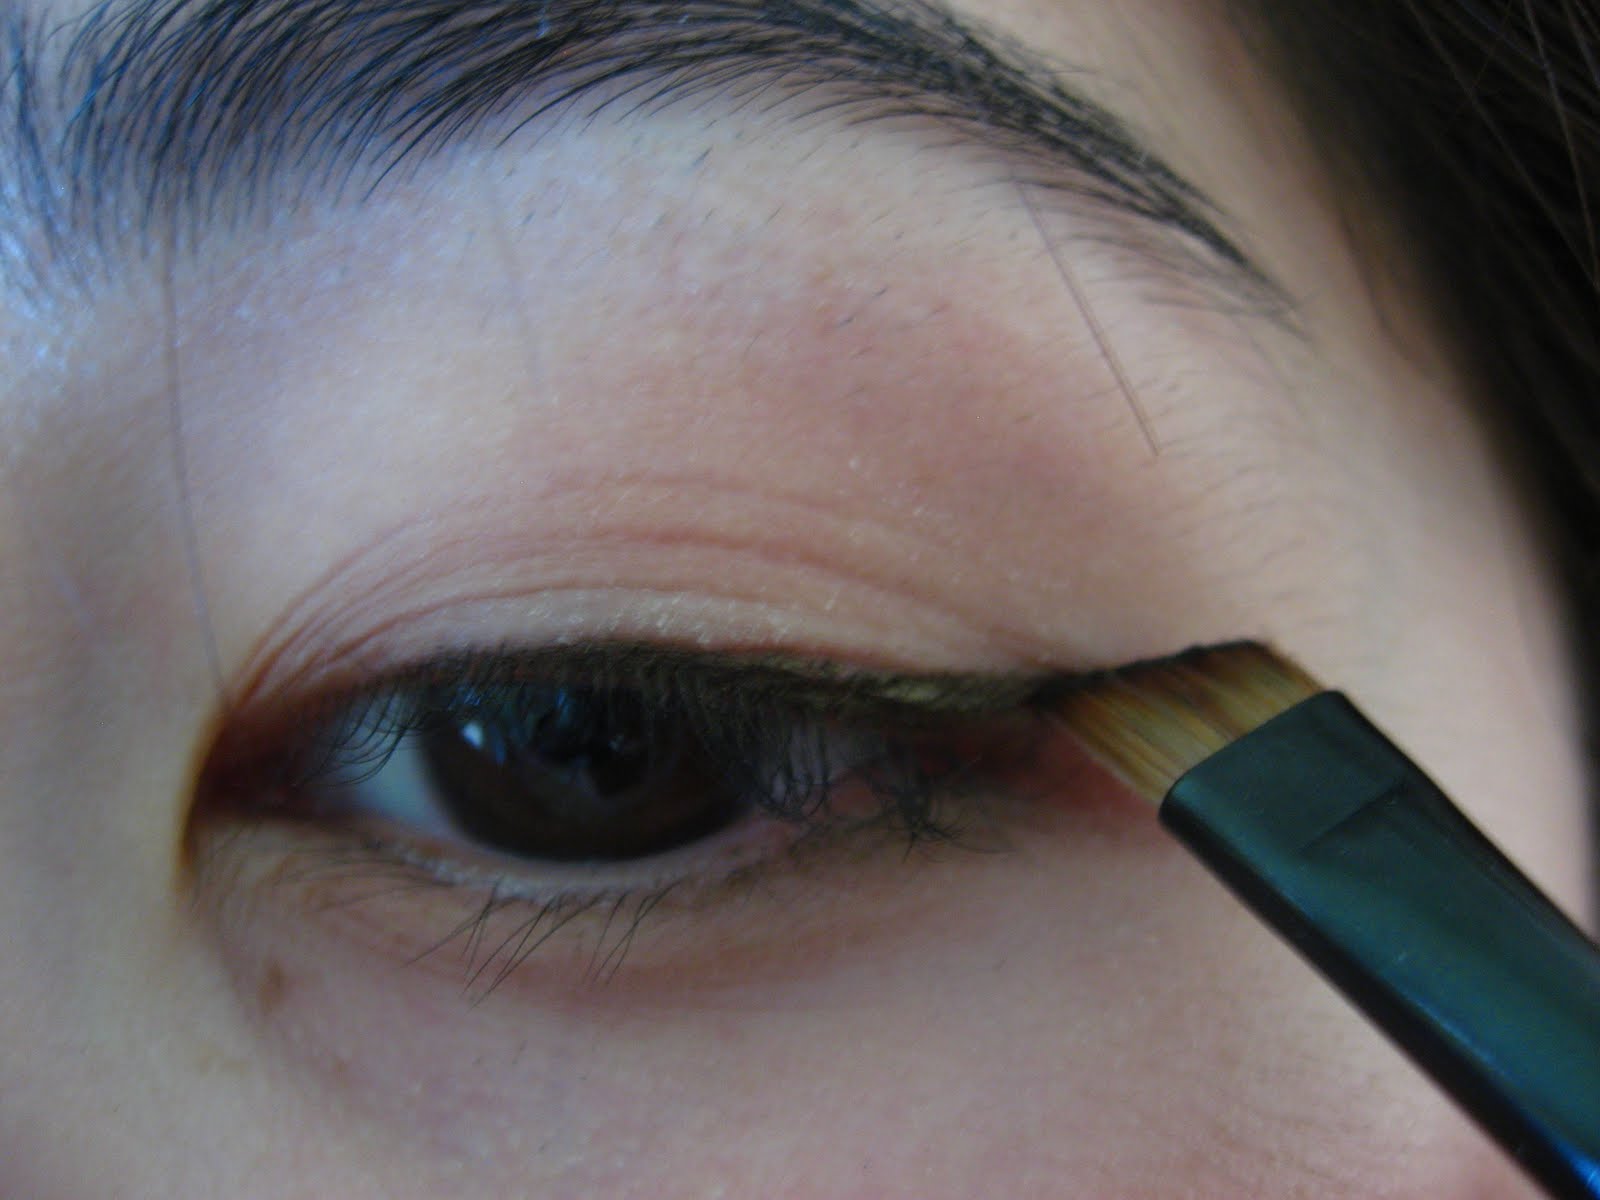
 If your using a angled brush, turn your brush inwards so that the short bristles are facing your inner lid and the longer ones are on the corner. Looking downwards with your head tilted 45 degrees to your mirror, place the brush in the angle you want your winged tip to be. If you need to, really gently stretch or just place your finger on the corner of your eyes so it is easier to draw your tip.
6. Connect everything

Take your brush and connect the top to the bottom. You can either do the whole bottom lash or just a little bit. In my case, i don't do the bottom but it doesn't really matter.
To finish it off, load your brush once again. Take your brush and turn it so that the longer bristles are on the inside and..yeah just look at the picture XD. Lightly sweep your brush tip to make that perfect wing. You don't actually have to brush anything anymore, your just making it nice, sharp and clean. And Voila~ (sorry if my wording sucks...but i hope the pictures help).


No comments:
Post a Comment